We’d like to welcome a special guest today. In this blog post, Natasha, LovelySkin’s Marketing and Special Events Coordinator, describes her experience with patchology PoshPeel Pedicure and her results after just one week.
1. Before patchology PoshPeel, how did you take care of your feet?
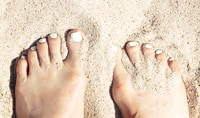
Poorly! I am really, really hard on mes pieds! When the weather is even slightly warm, I shirk wearing shoes whenever possible. When I do wear shoes, it’s often high heels. I even attend boxing class without shoes . . . my feet put in a very long day!
That said, I do keep a pumice stone in my shower, but I’m terrible about taking the time to do it. Sometimes I remember to put on lotion. And I try to get pedicures every three weeks, but with my schedule, I often push it to four. Before doing the patchology PoshPeel, I was at almost 6 weeks . . . Shhhhh! Don’t tell anyone – it’s embarrassing!
2. What made you want to try the PoshPeel?
I really love the idea of having soft, beautiful feet, but don’t prioritize doing what it takes to have them. I was looking for something that was simple and really effective that I might actually make time to do!
3. How did patchology PoshPeel affect your regular routine? What was the process like?
Doing the treatment didn’t disrupt my routine at all and it was really simple to do. Seriously. I started with the recommended soak in water as preparation . . . I just sat on the edge of the tub and put in 15 minutes on an e-book.
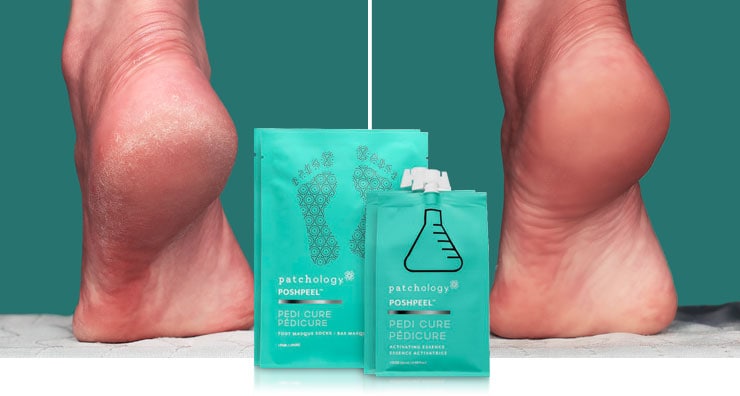
Once my tootsies were towel-tried, I poured myself a beverage (I had to be ready to settle in!); put the liquid in the booties; strapped them on and watched an old episode of Northern Exposure. I will say that the booties are really comfortable for being disposable and were better quality than I expected. But I was still a little nervous about poking a hole in them and getting liquid on our hardwood floors, so I did put a towel underneath my feet. Glad to report there were no holes(!), but I felt better about it.
Once I was finished with the 60-minute treatment, I soaked my feet for about 5 minutes. The package recommends soaking your feet for 15 minutes for best results, but we were heading out for the night so I needed to get moving.
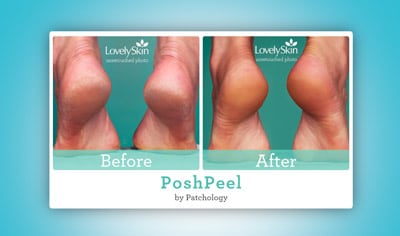
The packaging said I would see results in 3 to 7 days. That was a Tuesday. On Saturday morning, I took a shower and as I was drying between my toes, it happened; I got my first bit of peeling and it was a doozy! The calluses just sloughed off – I mean it was a little surprising, but it was amazing. I grabbed a separate hand towel and used it to help clear the exfoliation. I later learned you can also use a pumice stone or other mild exfoliation tool to enhance the results. As a side note: Whether you use a clean, dry washcloth or some sort of tool, I strongly recommend doing this step in the tub for easier clean up! After that, there was about a 15-hour window of continuous peeling and then (very minimal) residual peeling over the next couple of days. I followed up with lotion to take care of that beautiful, fresh skin that was exposed!
From start to finish, I was really impressed with the simplicity of the process and the significant improvement after only one treatment!
4. Did you see the results you hoped to achieve?
For the sake of this blog, I did not go “full-tilt.” I used only half of the amount of treatment liquid provided (one packet of liquid split between two booties) rather than one full packet in each because we wanted to see what kind of experience someone might have if they held back just a little bit. Maybe they have sensitive feet, don’t really have that many calluses to get rid of – or maybe their cat jumped on the table and knocked over the open container – who knows! There is any number of reasons why someone might use a little less and we wanted to be sure they would also get good results. Additionally, it seemed like the ultimate test . . . Would someone with really rough feet, still see the incredible results the company promises – even with only half of the recommended product? Turns out, the answer is a resounding “yes!”
5. How has your foot care routine changed since you tried patchology PoshPeel Pedicure?
I got more treatments! This is going to be a regular part of my routine. The convenience of taking care of my feet at home rather than going to the salon is huge for me. The cost is also really reasonable. With two treatments in the package, the cost is half – even less than half – of what a pedicure costs and the results are stellar.
I am eager to go another round and get to super soft! And I feel confident that I’ll be able to maintain it – that alone is worth the cost of admission! At our family’s holiday get-together this year, it’s pretty likely that there will be a whole group of people I love (men and women!) wearing booties and doing the foot treatments they get in their stockings!
Have you tried the patchology PoshPeel Pedicure? Let us know in the comments below, or tell us on Facebook, Twitter or Instagram using #LovelySkin!
Shop this blog
National Relaxation Day at Your Desk
A Foundation That Improves Tone and Text...
Follow us on social
Follow us on social networks and be one of the first to learn about sales, giveaways, and free samples