How to Straighten Your Hair - Quick and Easy Tips
This video will help you quickly straighten your hair with guidance from an aesthetician.

Video Summary
Did you know that you’re just minutes away from flawlessly sleek hair? It’s true! In this quick and easy LovelySkin tutorial, we show you how to straighten your hair like a pro using a flat iron. We also share some of our favorite tools for the job. Simply click on the video above to be on your way to straight hair perfection with our LovelySkin Aesthetician, Kristen.
Follow the Rule of the Five Ps
You may have heard of the Five Ps of Success: Proper Planning Prevents Poor Performance. We’re pretty sure this rule can be applied to just about everything, including your hair, but we’d like to make a motion to revise it just a little: Prep/Prime Produces Pretty Payoff. To get the most out of your flat iron, you’ll need to make sure that your hair is ready to go.
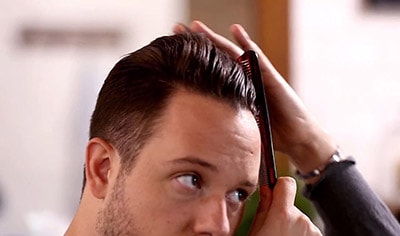
First, grab a brush or comb and run it through your hair, making sure that there are no knots or tangles. This will help your flat iron glide more smoothly over each section and produce a sleeker end result. We prefer a comb for those more minute tangles that can form at the nape of the neck and ends.
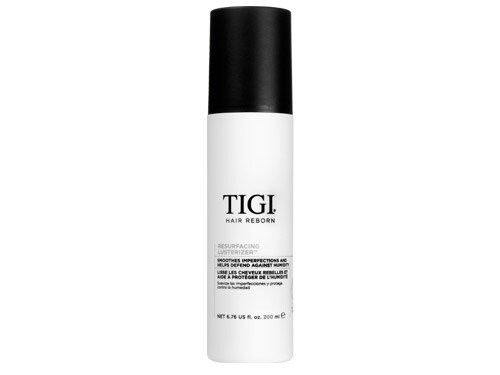
Next, you’ll want to pick up a heat protectant. Heat protectants are incredibly important because they help defend your hair against hot styling tools, which can be damaging over time. One of our favorite all-in-one products is TIGI Hair Reborn Resurfacing Lusterizer. Not only does this cream help shield hair from heat, it also guards against frizz and humidity, making it your ultimate ticket to a style that’s smooth, sleek and shiny.
You can either apply the product to your entire head of hair before you go in with your straightener or apply small amounts to each section as you go, just be sure to never skip this step. In our video, Kristen applied product throughout her hair before beginning.
Strike While the Iron is Hot…But Not Too Hot
Now, you’re ready to plug in your straightening iron. Be sure to check its heat setting and adjust it accordingly. Professional flat irons can reach over 400 degrees, a temperature that is too high to safely style most hair types. A good rule of thumb is 250-300 degrees for fine hair, 300-350 degrees for medium hair and 350-400 degrees for thick hair. If you aren’t satisfied with your straightening results, you can always raise the temperature gradually.
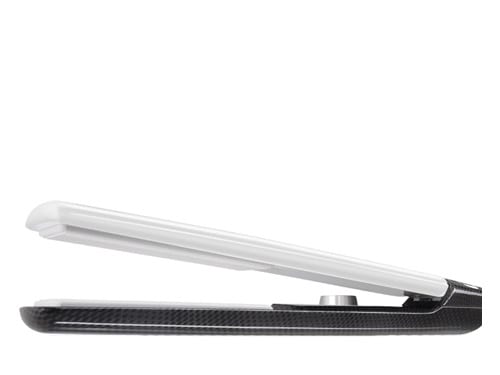
We love the T3 SinglePass 1” Straightening & Styling Iron, the winner of a coveted Allure Best of Beauty Award. It uses ionic, infrared heat to help seal in moisture and eliminate frizz, while advanced technology works to constantly maintain plate temperature. With the T3 SinglePass, you never have to worry about over-heating or uneven straightening. Plus, this iron is dubbed “SinglePass” for good reason—it’s so effective, that you should only need to go over each section one time to achieve the silky, polished style you want.
Divide and Conquer
Good news: you can now start straightening! We like to straighten by section. If you have multiple clips, you can work in small sections, pinning the rest of your hair back as you go. One hair tie or clip should do, though, for separating the top layer of hair from the bottom. Kristen twists the top half of her hair on the top of her head in a bun so that it’s out of the way.
Grab a one-inch section of hair, clamp the iron over it about an inch or so from the roots, and slowly glide it through to the ends. With a professional iron, you shouldn’t have to go over each one-inch section more than once, but if you feel you need to, we recommend saving any do-overs for the end of your styling session so that you don’t damage your hair. Repeat this motion over your whole bottom layer. Take your hair out of its clip or tie and straighten the top the same way.
To change up your style and create cool texture, you can either flip your iron in or out like Kristen shows you in the video to make a slight curve in or out. This looks especially fantastic if you rock a multi-layered ‘do with lots of different lengths.
Once you’re satisfied with your straight hair, grab your TIGI Hair Reborn Resurfacing Lusterizer again and pump just a little in your palm. We really mean just a little. Too much can weigh hair down or make it look greasy, and you just want to smooth any strays or fly-aways. A dime-size or even less should do just fine. Rub it together in your palms to warm it and then run it through your hair, concentrating it on areas that could use extra refining. And you’re finished! You’ve just straightened your hair while keeping it safe from damage.
Make it a second-day style by picking up a dry shampoo, like Klorane Dry Shampoo with Oat Milk. Spritz it in the morning after your straightening session, let it soak in for two minutes and then brush it out with your fingers or a brush. This will give you instant volume and preserve your style for one more day.
Did you find this hair-straightening tutorial helpful? Please let us know in the comments section. We would love to hear what you want to see next.
Shop This Video
2 products
Product no longer available
Product no longer available


Comments